
YOUR CLASSROOM IS YOUR SPACE.
Whether you’re teaching Kindergarteners or Sophomores, how you design your classroom needs to work stylistically and efficiently. From procedural items like pencil buckets or classroom management bulletin boards to just plain decor to spark your students’ imaginations, there are so many places to begin. It can be very overwhelming.
LUCKILY, I’VE DONE SOME OF THE WORK TO HELP YOU GET STARTED.
If you want specific lists on procedures to teach, to-do lists, or design inspo, click the link below:
To learn about how I designed my classroom for 7th Graders, keep reading!
STARTING POINT: THEME AND AESTHETIC

I’ve done classic classroom decor themes in the past, but this year I decided to go beyond and really choose what I would want. Your classroom is your space as much as it is your kids’, so it’s important to consider both their age level, comfort, and your own personal taste.
The best place to start is to create a mood board/inspiration aesthetic page on Pinterest or Canva. Allow yourself to just think about design, color, and style—let functionality sit on the back burner for now. This is just the time to dream. The image above is where I began once I decided I wanted a vintage, coffeehouse vibe. Of course, this concept works for 7th Graders—not so much for the younger grades.
SUMMARY:
Pick 4 core colors for your palette
You can decide on a concrete theme like superheroes or jungle, or just an overall mood like cool tones or eucalyptus gold.
Notice textures, shapes, and design elements you’re drawn to. Mine were brick, chalkboard, matte black and eclectic items.
NEXT: CONSIDER YOUR GIVEN SPACE
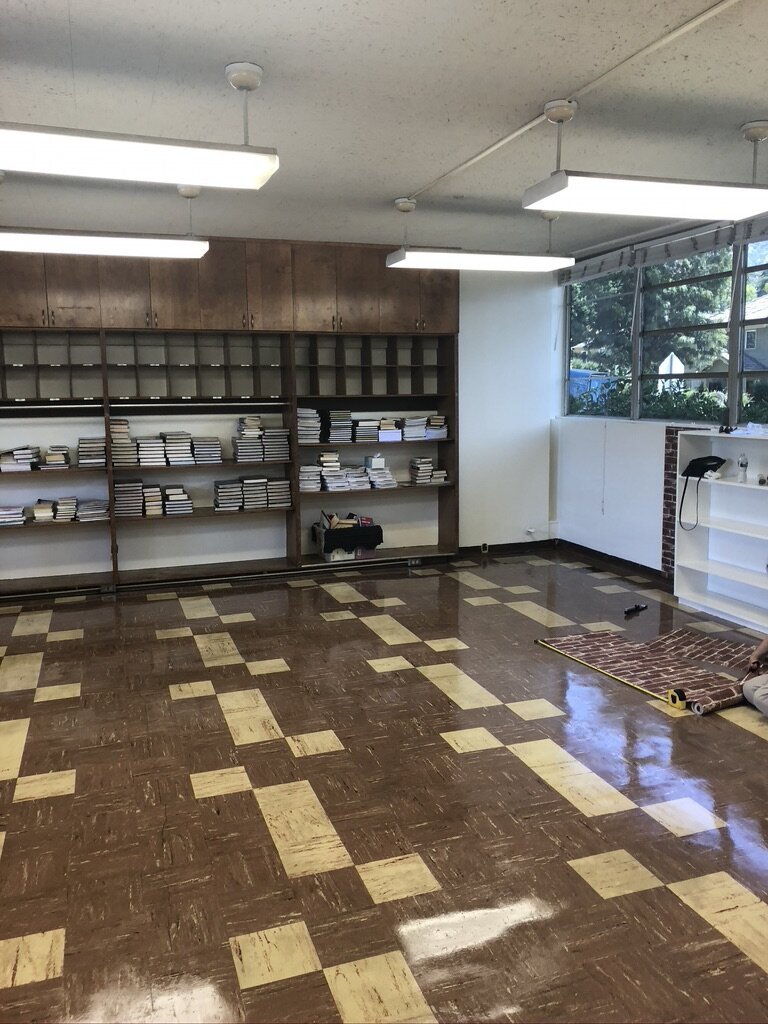
Before photo^
We all wish we could demo everything and start from scratch like we’re Chip and Joanna on Fixer Upper. But alas, we’ve got to work with what we’re given.
It’s helpful to take account of your current classroom space—the location of bookshelves, windows, and overall measurements should be recorded. Then think of your room as a map. These immovable “landmarks” will help shape your layout and design.
For example, I used the back corner of the room as a reading nook since it was tucked away and near the bookshelves. I also had a green chalkboard attached to the east wall (seen below) so I was inspired to create a bar wall for individual flexible seating.

SUMMARY:
List your landmarks. Try to transform these into functional spaces (i.e. seating, storage)
Map your classroom in a bird’s eye view. Consider measurements of all landmarks and the number of desks or furniture needed.
Less is more with larger furniture pieces. Your classroom must flow.
FLEXIBLE SEATING - I’M A CONVERT
I used to be very anti-flexible seating—how could you control kids’ behavior when they’re allowed to sit wherever they want? But I’ve since come around to understand the benefits of flexible seating and how it maximizes productivity and concentration.
If you’re considering flexible seating as a classroom layout, take a look at the following options:
benches
pillows/poofs
yoga mats
rugs
futon or couch
lap desks or clipboards
unique chairs or stools
beach chairs
wobble stools or balls
scoop rockers
coffee tables
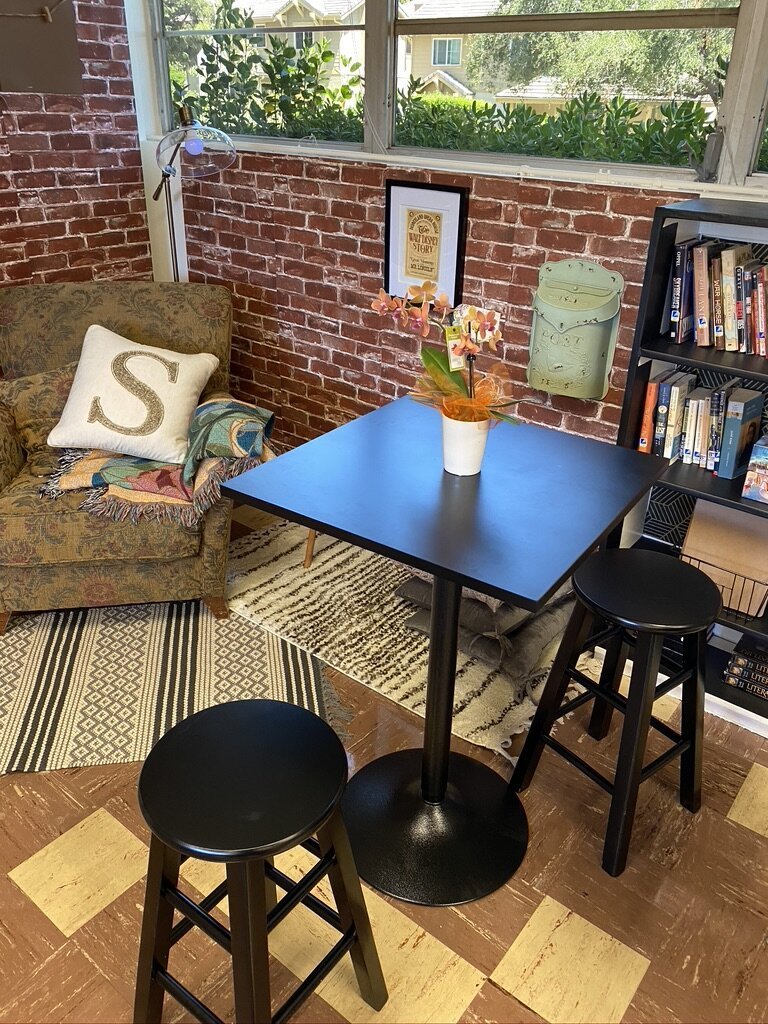
Facebook Marketplace and garage sales are perfect for finding these kinds of items. I also decided to pick furniture pieces that I could use in my own apartment, just in case I needed to remove items if they weren’t working. I splurged on a few pieces (like the bar tables) but the rest I got cheap. The nice leather sofa was only $20 on Facebook Marketplace!
I also layered rugs and collected different kinds of pillows that went with my aesthetic.
SUMMARY:
Browse Facebook Marketplace or Craigslist for cheap and eclectic flexible seating furniture
Vary your items—too many types of chairs can get repetitive and crowded.
Consider easy storage like yoga mats and pillows. I also got clipboards for every kid, which I stored in metal crates I got from the dollar store.
DESIGNING WALL DECOR FOR THE LADY LAZY BOSS

Wall space is expensive real estate—you’ve got to have room for anchor charts, posters, student work, inspirational photos, etc. without it all looking too busy. Not to mention the dreaded BULLETIN BOARD (maybe I just dread them? Idk why).
Here’s how I did it without pulling my hair out:
Brick wallpaper to create contrast in a completely white room - this helped with the coffee house vibe, and was really easy to install. I just stapled them to the walls. These rolls can be purchased here for $26.99 per roll on Amazon.
Peel and stick black paper for the bookshelves and one with an art deco trim - this was a little extra of me to do, but I loved the design and couldn’t let it go. When I started redoing the shelves, I regretted my choice UNTIL everything was done. Then all the work was well worth it. The paper can be purchased on Amazon here for $8-$20 per roll depending on the size.
“World’s Best Class” mug wall design for student work - I love The Office, so this was a subtle way to reference the show while maintaining the coffeehouse theme. I arranged black, brown and green scrapbooking paper on top of the brick (seen above) and pinned twine with clothespins in rows. This way, I can easily display student work without having to change the wall decor or get out the staple remover. I got all of the items from Michaels, but you can download my mug graphic here as a freebie!
Personal photo wall (seen above) - this had no function for my students other than being cool to look at. Worth every penny! I scrounged for different-shaped picture frames on Facebook Marketplace and HomeGoods. I also bought the book, Poster Art from the Disney Parks on Amazon (found here) for $32. I cut out pages I wanted to use in picture frames, arranged the wall, and boom! Done and done.
Paper and bulletin board items - I love the store, Learning with Kiki on TeachersPayTeachers for digital downloads of paper items like calendar, binder covers, nametags, etc. I used the Eucalyptus Gold Classroom Decor Kit found here for all of my signs and paper items. All of the files are completely customizable as well. See below for how they turned out!

FINALLY, BE OPEN TO CHANGE
You’ll never know how everything will work until you have kids in the room. I’ve moved a couple of seating arrangements around (heLLO social distancing), so it’s important to adapt to any situation. But enjoy the ride!